 Installation Guide
 BioShieldUV® Classic (S) Series Complete Installation Guide
Models covered: BioS 18W Classic | BioS 36W Classic | BioS 72W Classic
20 min Install Time 8,000 Hours Lamp Life 253.7 nm UV-C WavelengthBefore You Begin: ApxShield plugs into a standard 120 V outlet and can be installed by a homeowner. If you are not comfortable drilling the duct, hire a licensed HVAC technician. All installations must comply with applicable national and local building codes. Read all safety warnings in full before handling any components.
Suitable for Air-Handling Use Dry Locations OnlyQuick Start options
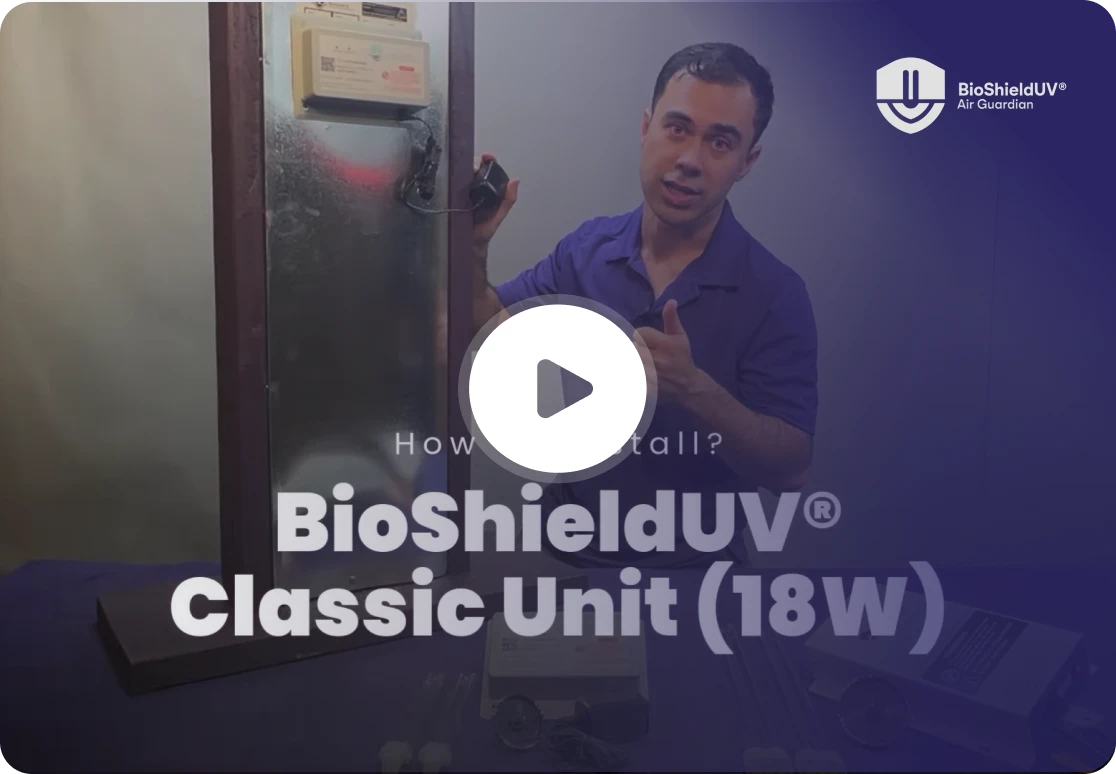
Watch Installation Video:
Jump to a section:
Safety Precautions Where to Install Preparing HVAC Wall (Part 1) Preparing Base Unit For Install (Part 2) Placing Base Unit Onto HVAC Wall (Part 3) Product Markings Troubleshooting Frequently Asked Questions Follow Safety Precautions closely before beginning installation.Need help with your BioShield UV unit?
Find a certified installer in our professional directory.
Contact UsCheck Which Model You’ve Purchased
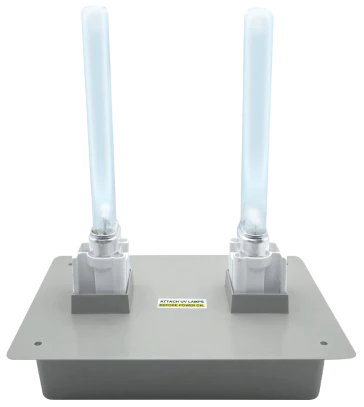 BioS 18W Classic BioS 36W Classic
 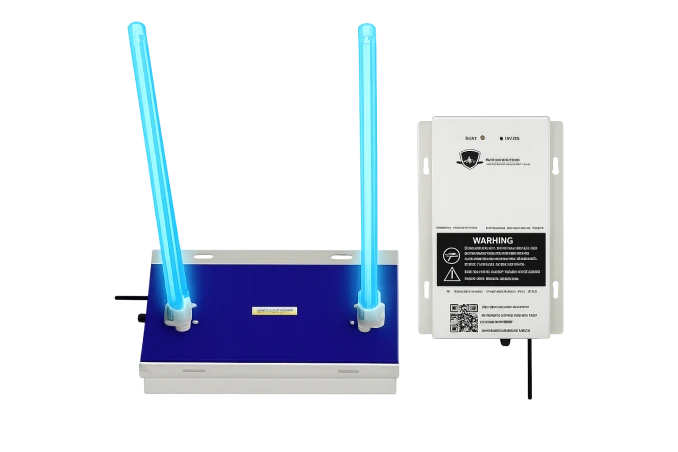 BioS 72W Classic
 If You Ordered The Wrong Model, Please Contact Us To Exchange
Text or call (US & Canada) : +1 (307) 364 0340 Email : [email protected]Safety Warnings
Follow all safety and building codes. Read every warning below before installing, adjusting, or servicing the unit. These warnings apply to all models and all installation environments.
This is the safety-alert symbol
It is used with a signal word — DANGER, WARNING or CAUTION — to call out a hazard to people. DANGER means a hazard that will cause death or serious injury if not avoided. WARNING means a hazard that could cause death or serious injury. CAUTION means a hazard that could cause minor or moderate injury.
SAVE THESE INSTRUCTIONS — keep this guide with the installation.
WARNING Installation Safety
Read the manual carefully before attempting to install the unit. Improper installation, adjustment, alteration, service, or maintenance can result in fire or electrical shock and create a risk of personal injury or property damage. Consult a licensed electrician or contractor for assistance during installation.
Lamp Handling
Handle the UV lamp with gloves at all times. Oils from bare hands reduce UV output and cannot be reversed by cleaning.
If the lamp glass is touched without gloves, wipe the affected area with isopropyl alcohol before powering the unit on.
WARNING Eye Safety
Never expose eyes directly to UV light. Looking at the lamp can cause eye damage.
Wear safety glasses during installation and any maintenance work.
UV Material Exposure
UV-C light travels in a straight line and will degrade certain materials that fall within its direct path over time. Plastic drain pans, flex duct liner, foam insulation, filter media, and exposed wiring are all susceptible.
Before installing, shield any vulnerable materials with aluminum foil tape. Metal ductwork and components are unaffected.
WARNING Electrical Safety
Turn off the main power switch before plugging in the unit or performing any maintenance on it. Some installations have more than one disconnect switch. Check for all of them before beginning work. Do not open the ballast housing built into the base unit, or the adapter housing — there are no user-serviceable parts inside.
CAUTION Broken Lamp Hazard
Never touch a broken UV lamp with bare hands.
UV lamps contain a small amount of mercury and may be harmful to skin and eyes if released. If mercury contacts skin, wash the area immediately with mild soap and water and seek medical attention if necessary. Carefully collect broken pieces and dispose of them in accordance with local environmental regulations. Do not use a household vacuum to clean up a broken lamp — sweep the pieces into a sealed plastic bag, ventilate the room, and dispose of them according to your local waste authority's instructions.
WARNING Location Restrictions
Improper installation, adjustment, alteration, service, or maintenance can result in fire or electrical shock.
Installation Restriction
This unit is rated for dry locations only. Install it only on the side where air enters the evaporator coil — never on the coil's discharge side, where condensate blow-off reaches the lamp, and never downstream of electric heat strips or a humidifier. Do not use it in air handlers or furnaces with supplemental electric heat. Do not install this unit outdoors.
This luminaire is designed for use with germicidal lamps and must be installed in compliance with competent technical directions to prevent the user's eye and bare skin from exposure to harmful UV radiation.
Ce luminaire est conçu pour être utilisé avec des lampes germicides et doit être installé en stricte conformité avec les instructions afin d'éviter que les yeux ou la peau de l'utilisateur ne soient exposés aux effets néfastes des rayons UV.
What is in the Box
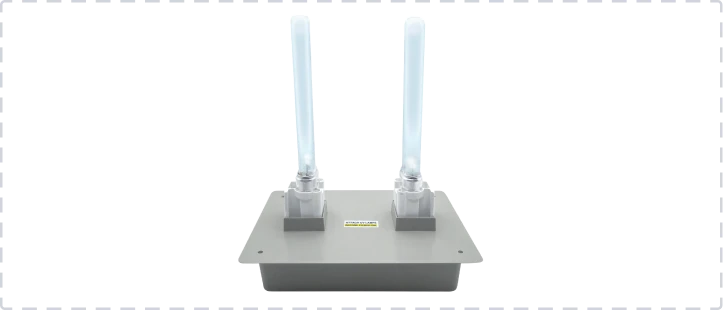 A
A Ballast & 2 UV-C Bulbs
Integrated ballast with two UV-C bulbs
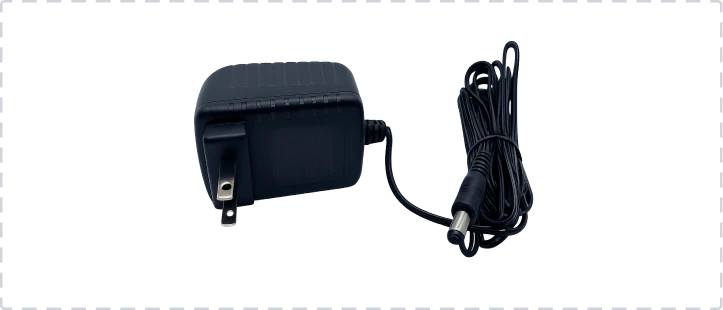 B
B 120V Wall Adapter
Powers the base unit
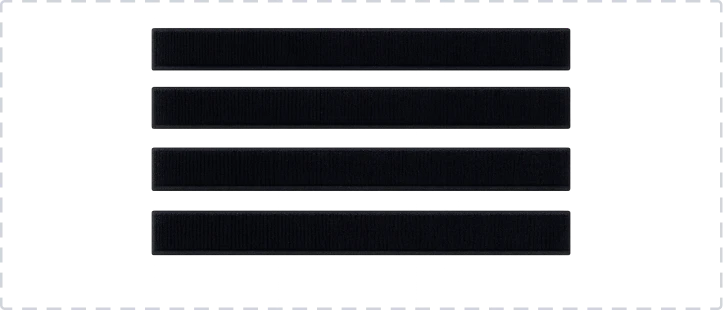 C
C Air-Seal Strips
Perimeter gasket, peel-and-stick
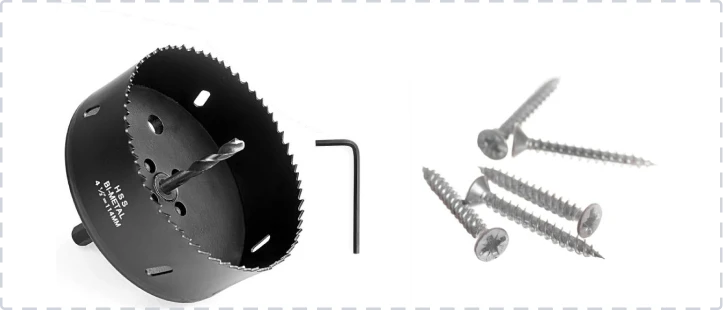 D
D Metal Drill Bits & Mounting Screws
For bulb holes and corner mounting screws
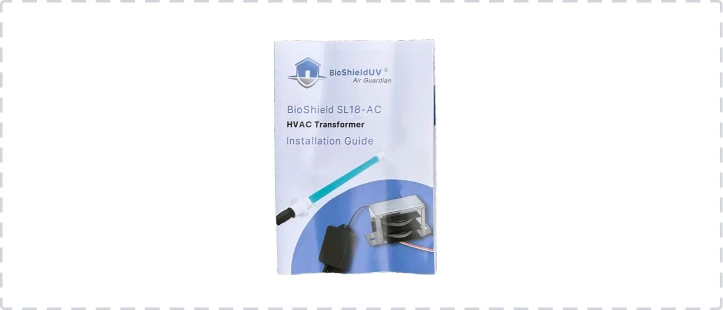 E
E User Guide
Printed user guide
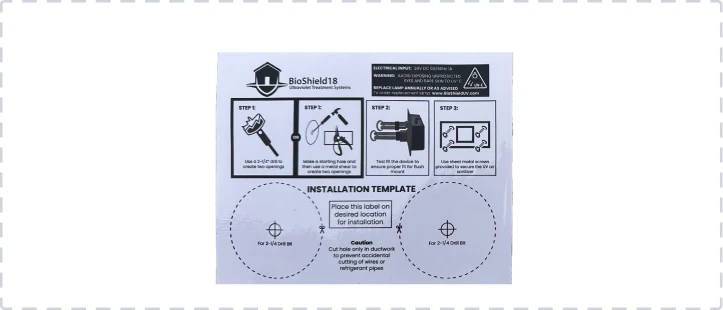 F
F Adhesive Drilling Template
Marks bulb holes and mounting screw positions
Disclaimer: The information in this guide is provided for educational purposes only. BioShieldUV is a manufacturer of UV-C air treatment devices and does not provide installation services. All installations must be performed in compliance with applicable national and local electrical and mechanical codes. BioShieldUV makes no pesticidal claims. UV-C technology does not replace filtration, ventilation, or other air quality measures. This product is not sold as a medical device and is not for the purpose of diagnosis, treatment, mitigation or prevention of any disease or condition. Results will vary based on system configuration, installation location, and proper maintenance. UV lamps contain small amounts of mercury. Dispose in accordance with local environmental regulations. For recycling information, visit www.lamprecycle.org.
Safety Precautions Before Installing
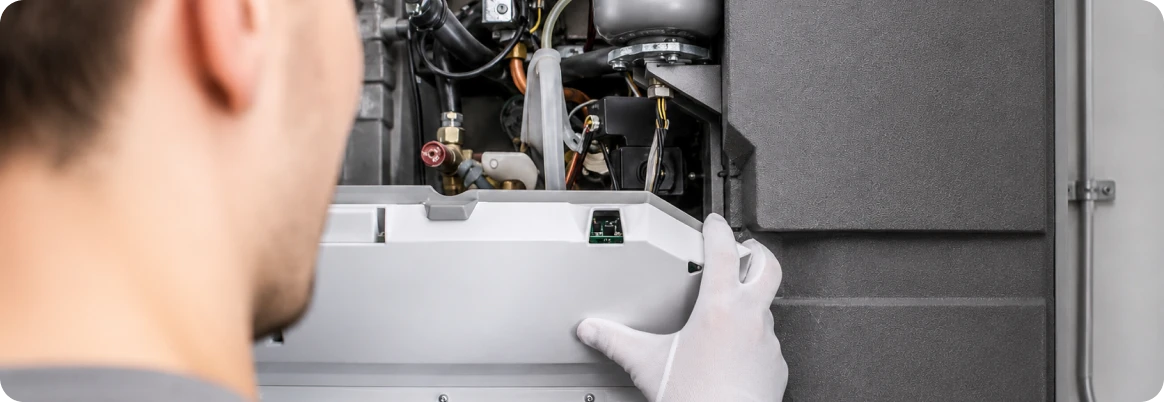
Turn off HVAC system and ensure all electrical connections are off.
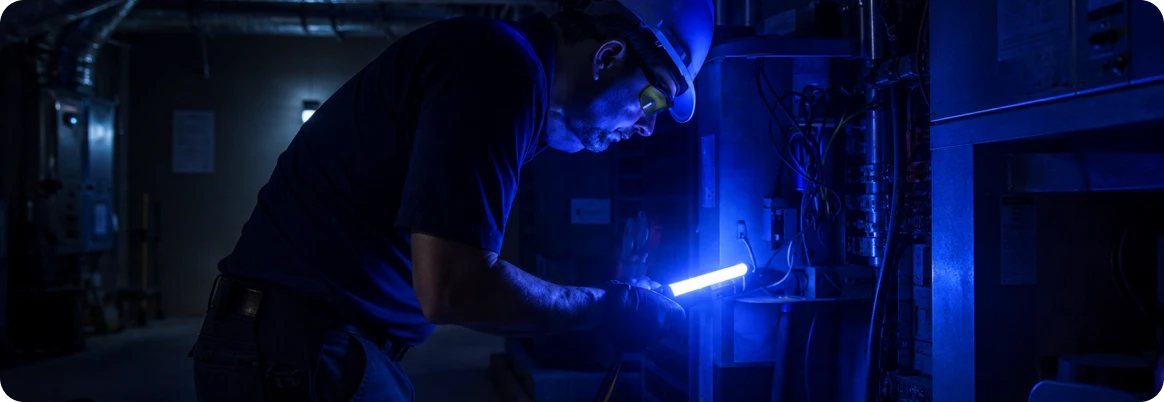
Never look directly at UV-C light. Wear protective eyewear and gloves. Avoid touching the bulb glass or clean it with isopropyl alcohol if touched.
Where to Install
Swipe the diagram sideways to see all of it →
The ApxShield bulbs go into the duct where air enters the coil, with the base unit outside the duct. Duct clearance needed: 7″ (18W), 10″ (36W) or 17″ (72W).Mount the ApxShield where air enters the evaporator coil. Never on the coil's discharge side (wet from coil blow-off), downstream of electric heat strips, or downstream of a humidifier. Dry locations only.
Measure the inside of the duct before drilling: at least 7″ for the 18W, 10″ for the 36W and 17″ for the 72W, so the bulbs fit completely inside. Keep the base unit, its adapter cord and the adapter itself outside the duct.
Part 1: Preparing HVAC Wall
01Position Template
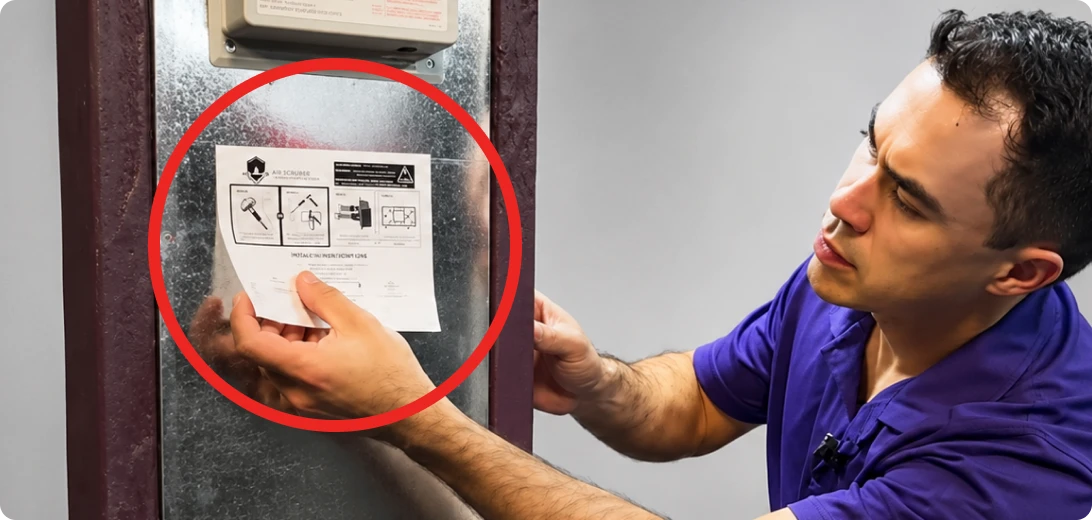
Place the mounting template on the HVAC panel (included in the kit). It is a sticker and should stick on easily.
02Drill Holes for Bulbs
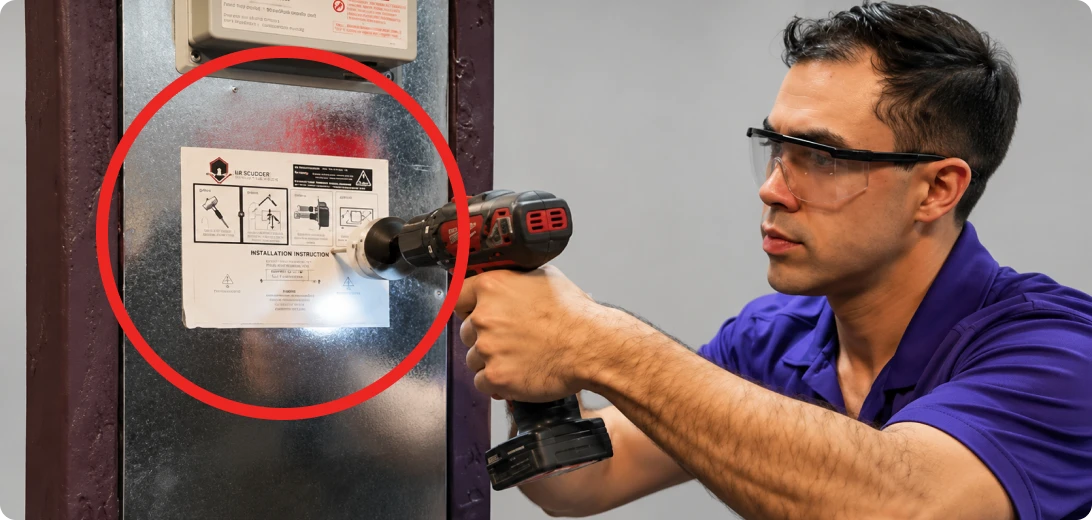
Drill two holes at the template’s marked positions where the bulbs would go (circular drill bit included).
03Drill Holes for Mounting Screws
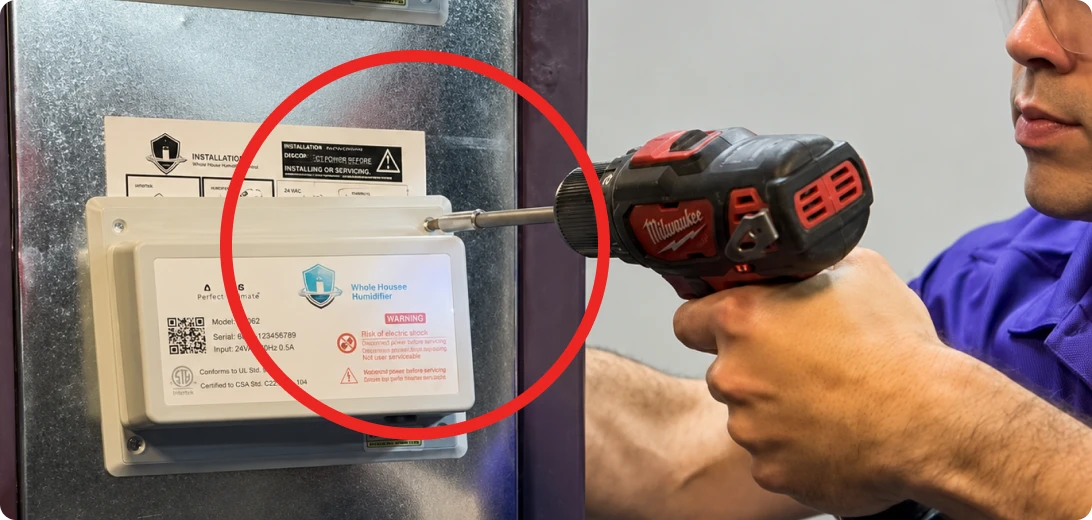
Drill 4 holes on the corners (marked in the template) where the mounting screws would be inserted (circular drill bit included).
Part 2: Preparing Base Unit For Install
01Slide UV-C Bulbs Into Slots
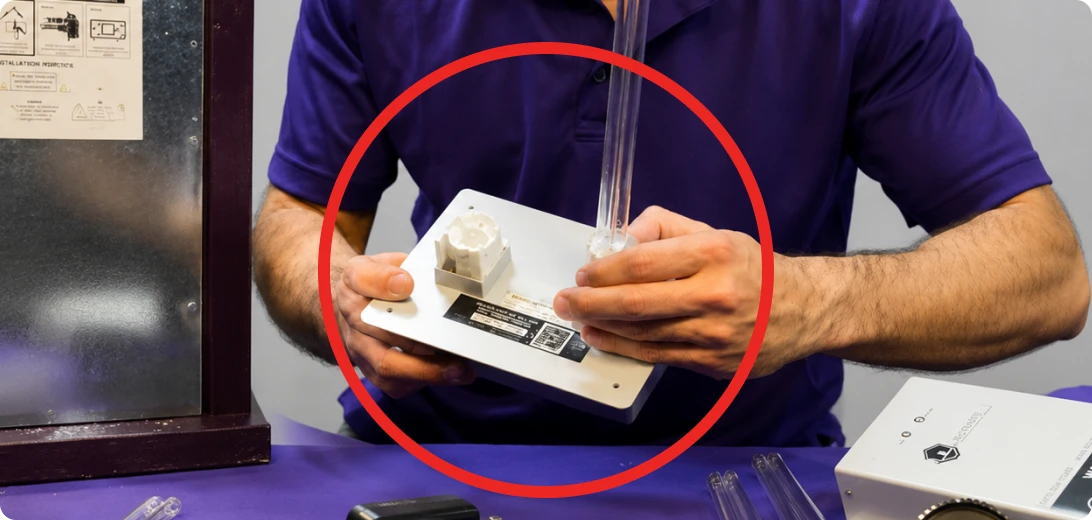
There are two slots on the base unit. Slide the UV-C bulbs into each slot till you hear them click.
02Seal Strips (Optional)
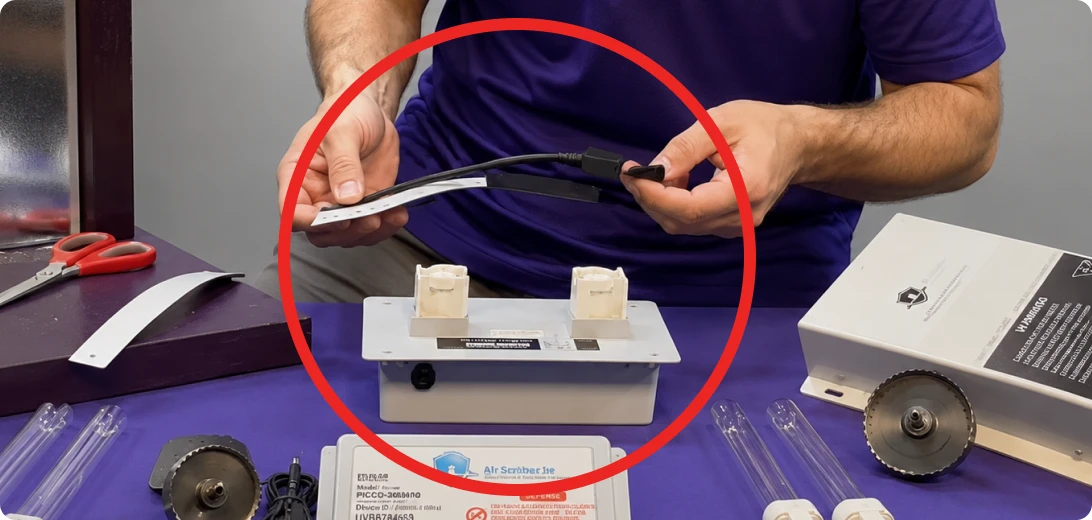
Peel off the back of the air-seal strips and stick them around the perimeter of the base unit. (Air-seal strips included in the kit, cut to size if required).
Part 3: Placing Base Unit Onto HVAC Wall
01Place Unit Into The HVAC Wall
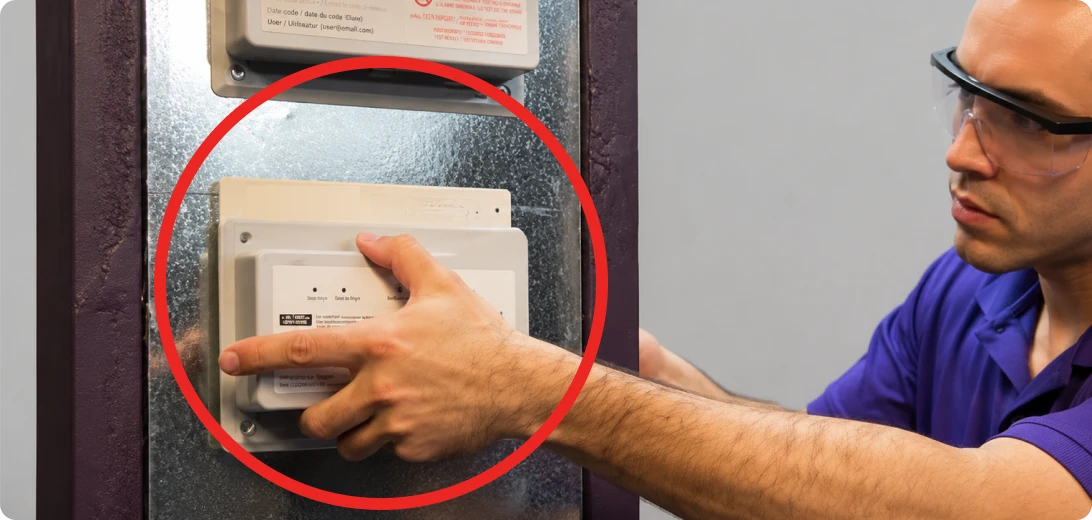
Pick up the prepared base unit and carefully insert the bulbs into the drilled holes. Make sure the corner holes align with holes on the unit.
02Screw In
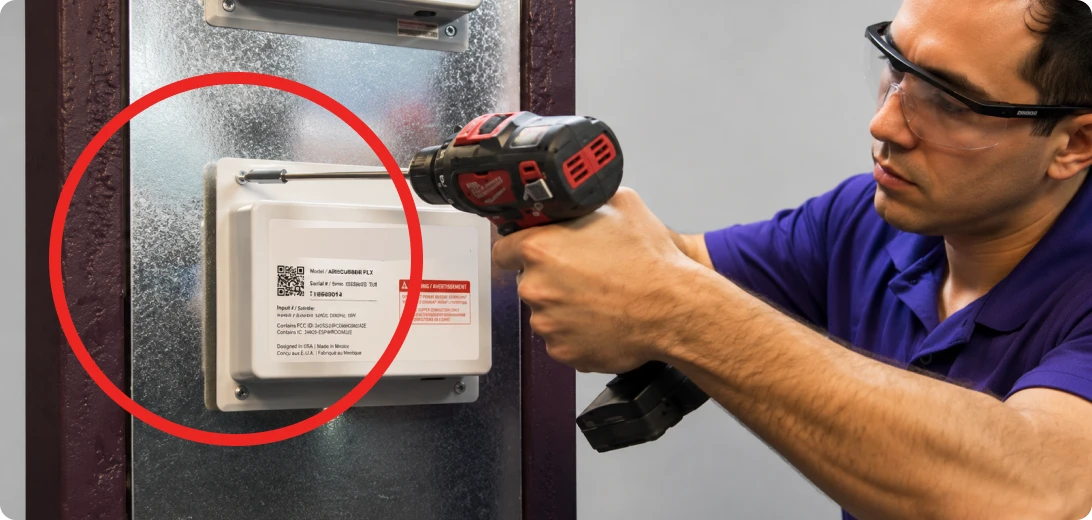
Use the provided screws to secure the unit in place.
03Combine Power
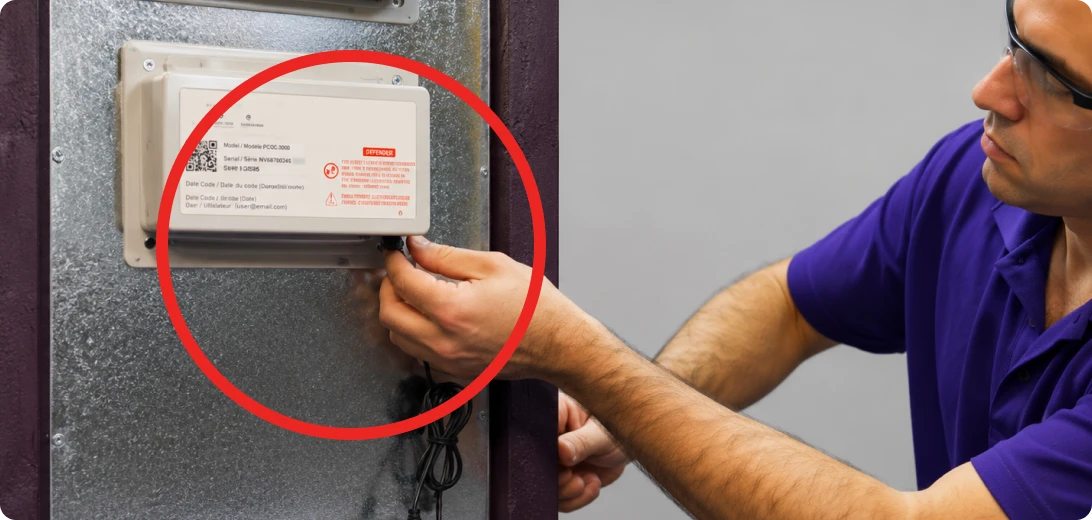
Before plugging in, confirm every seam, mounting screw and bulb slot is fully seated so no gap remains for UV-C light to escape. Attach the adapter to the base unit, then plug it into a nearby always-on 120 V outlet — not one controlled by a wall switch.
Post-Installation Checks
Ensure the indicator light is ON — this confirms the lamp is operating. Never look into the duct at the bulbs to check them.
Clean around the unit of any dust to maintain optimal UV performance.
Maintenance & Replacement
Replace the UV-C bulbs every 10 months (approximately 8,000 hours).
Output fades before the bulb goes dark — replace on schedule, not on appearance.
- Unplug the adapter and let the bulbs cool. Never look into the duct openings while the unit is on.
- Remove the four mounting screws and pull the base unit straight out of the duct.
- Slide the old bulbs out of their slots and slide in new UVBulbs-S18, UVBulbs-S36 or UVBulbs-S72 (same model) until they click.
- Refit the unit with the same screws, plug the adapter back in and confirm the indicator light is on.
- 72W model with no power at a live outlet: check the fuse and replace it only with the rating printed on the unit.
Product Markings
Every ApxShield unit carries ONE label on its base unit: the model’s ratings, the markings below, and the UV warning. The base unit is the access point — lifting it off the duct exposes the bulbs — so the warning is on the unit itself.
| English | Français |
|---|---|
| This luminaire is designed for use with germicidal lamps and must be installed in compliance with competent technical directions to prevent the user's eye and bare skin from exposure to harmful UV radiation. | Ce luminaire est conçu pour être utilisé avec des lampes germicides et doit être installé en stricte conformité avec les instructions afin d'éviter que les yeux ou la peau de l'utilisateur ne soient exposés aux effets néfastes des rayons UV. |
| Use only TruBlu™ replacement bulbs UVBulbs-S18 (18W), UVBulbs-S36 (36W) or UVBulbs-S72 (72W). | Utiliser uniquement les ampoules de rechange TruBlu™ UVBulbs-S18 (18 W), UVBulbs-S36 (36 W) ou UVBulbs-S72 (72 W). |
| Use thermally protected ballast for type UVBulbs-S18 / UVBulbs-S36 / UVBulbs-S72 lamps. | Utiliser un ballast protégé thermiquement pour les lampes de type UVBulbs-S18 / UVBulbs-S36 / UVBulbs-S72. |
| WARNING — UV LIGHT HAZARD. Harmful to eyes and bare skin. Can cause temporary or permanent loss of vision. Never look into the duct at the bulbs — check operation only through the indicator light. Unplug the adapter before removing the unit from the duct or servicing it. | AVERTISSEMENT — DANGER : LUMIÈRE UV. Nocifs pour la peau nue et les yeux. Peut causer une perte de la vue temporaire ou permanente. Ne jamais regarder les lampes dans le conduit — vérifier le fonctionnement uniquement par le témoin lumineux. Débrancher l'adaptateur avant de retirer l'appareil du conduit ou de l'entretenir. |
| Suitable for air-handling use. | Convient au traitement de l'air. |
| Dry locations only. | Pour emplacements secs seulement. |
| To prevent electric shock, match wide blade of plug to wide slot. | Pour éviter les chocs électriques, introduire la lame la plus large de la fiche dans la fente la plus large. |
| 72W model: replace the fuse only with one of the rating printed on the unit. | Modèle 72 W : remplacer le fusible uniquement par un fusible de même calibre que celui indiqué sur l'appareil. |
| WARNING — Ultraviolet radiation hazard. Harmful to eyes and bare skin — can cause temporary or permanent loss of vision. Never look at the bulbs while lit. Disconnect power before servicing or removing this unit from the duct. | AVERTISSEMENT — Rayonnement ultraviolet. Nocifs pour la peau nue et les yeux. Peut causer une perte de la vue temporaire ou permanente. Ne jamais regarder les ampoules allumées. Couper l’alimentation avant tout entretien ou avant de retirer cet appareil du conduit. |
Never Miss a Replacement with Guardian Club
Guardian Club automatically ships you a replacement lamp every 10 months. Members receive 10% off replacement bulbs, automatic warranty coverage, and hassle-free delivery every cycle.
All replacement bulbs include a 14-day warranty from the date of delivery. Guardian Club members receive extended coverage of up to 6 months from delivery.
Free to join. Ships automatically. Keeps your warranty active.
Join The Guardian Club Order Replacement Bulbs www.BioShieldUV.com/club
 Troubleshooting
| Issue | Likely Cause | Fix |
|---|---|---|
| No indicator light | Unit isn’t getting power | Check that the outlet is live, the adapter is fully seated, and the breaker hasn’t tripped. |
| Bulb won’t seat | Bulb isn’t fully inserted | Push the TruBlu bulb in until you hear an audible click. It should sit flush in the socket. |
| Faint odor on first use | Normal lamp and ballast burn-in period | This is expected during the first run and normally dissipates within 24 to 48 hours. Ventilate the space if it persists. For what causes the odor and our UV-C testing, see the odor science page and certifications page. |
| Air leakage around the unit | Gap between the unit and duct panel | Apply air-seal strips or foil tape around the perimeter to close the gap. |
UV-C Lamp Disposal
UV-C lamps contain a small amount of mercury and must be disposed of in accordance with local environmental regulations. Do not place used lamps in standard household waste unless your local waste management authority explicitly permits it.
Visit www.lamprecycle.org to find mercury lamp recycling locations near you, or www.earth911.com to locate your local or state waste management program.
Many hardware and home improvement retailers that sell UV or fluorescent bulbs also accept used bulbs for drop-off recycling at no charge. If no recycling option is available and local regulations allow, seal the lamp in a plastic bag before placing it in household waste collection.
Frequently Asked Questions
Do I need a professional installer? No. ApxShield is homeowner-installable — it plugs into a standard 120V outlet and needs no dedicated wiring. If you are not comfortable drilling the duct, hire a licensed HVAC technician. Where should I install it? Where air enters the evaporator coil — never on the coil's discharge side, which is wet from coil blow-off. See Where to Install. How much duct clearance do I need? The 18W needs at least 7 inches, the 36W at least 10 inches and the 72W at least 17 inches. Measure the inside of the duct near the coil before drilling. Can I install this on non-metallic ductwork? Yes. ApxShield mounts with screws through the duct wall and works with metal, fiberglass board and flex ductwork. What does the indicator light mean? When it is lit, the unit is powered and the bulbs are operating. If it is not lit, check the 120V adapter at both the outlet and the unit. The indicator does not show bulb age — replace the bulbs every 10 months. Is the ApxShield ETL listed? Not yet. Certification of the complete unit with Intertek is in progress. We will show the ETL mark only once the listing has been issued. See our certifications page for current status. The unit smells strange on first use. Is that normal? A faint smell can occur when the bulbs first energize and should fade within 24 to 48 hours. Ventilate the space; a persistent strong smell warrants a check of placement. See our odor science page for more. Will UV-C damage plastic or rubber components inside my system? Prolonged direct exposure can degrade some plastics, rubber and wire insulation. Keep non-metallic parts out of the direct beam and inspect nearby materials periodically. How do I know when to replace the bulb? Every 10 months (about 8,000 hours). UV-C output fades before the bulb goes dark, so replace on schedule. Guardian Club ships replacements automatically.Take replacement off your to-do list entirely. Guardian Club members receive automatic delivery on the right schedule. [Join for free →]
Need Help?
 Text or Call: +1 (307) 364 0340 - available in the US and Canada Email: [email protected] Hours: Monday to Friday, 9 am to 6 pm PST